I finally got around to picking Tauri back up as I'm excited for the possibilities that open up with the new mobile build targets and I am impressed with the progress of the framework and direction it's going. This is kind of a sharing as I learn type of post more than a how-to guide, I'm composing this to reinforce for myself how these systems work and hopefully someone else will find this useful. As such this is kind of a mid level introduction that assumes some familiarity with HTML/CSS/Javascript/Rust/Bash for building apps with Tauri using Svelte as the front end javascript framework, Svelteflow as the node visualization framework, Rust as the back end language, and SQLite as the back end data store. I'm assuming the reader can setup the prerequisites with just the following list.
So our stack in brief is:
HTML/CSS/Javascript: for the front end GUI, logic, and bling
Svelte: as our modern javascript framework that makes things easier
SvelteFlow: as a library for visualizing graphs
Rusqlite: for our SQLite3 database SDK in the Rust backend
Local Development is only tested on an ARM Mac.
Let's start with the Tauri beta, you need to navigate to this website instead of the main Tauri website to get the beta installer script and documentation. In previous versions of Tauri we would first start a Svelte application and add Tauri, but in the beta Svelte has been added as one of the framework options, so we can pretty much just dive in.
Assuming your shell is bash or zsh, we run this command to download and execute the beta installer:
sh <(curl https://create.tauri.app/sh) --alpha
Which should have output like this before it goes into setup option questions:
❯ sh <(curl https://create.tauri.app/sh) --alpha
  % Total    % Received % Xferd  Average Speed   Time    Time     Time  Current
                                 Dload  Upload   Total   Spent    Left  Speed
100 16122  100 16122    0     0   102k      0 --:--:-- --:--:-- --:--:--  107k
info: downloading create-tauri-app
? Project name (tauri-app) ›
Just fill out the options like this:
Project name: flow-walkthrough
Frontend: Typescript/Javascript
Package manager: npm
UI Template: Svelte
UI Flavor: Javascript
Mobile as well? y
I'm going to skip the additional steps needed for mobile development for now, but if you are going that route you will need things like Android Studio or Xcode as dependencies. The website goes through those in detail:
https://beta.tauri.app/guides/prerequisites/
Change directory into your new project directory and use npm to install our basic project dependencies.
❯ npm install

added 66 packages, and audited 67 packages in 5s

11 packages are looking for funding
  run `npm fund` for details

found 0 vulnerabilities
Which should get you this file layout:
❯ tree --depth=2
.
├── index.html
├── jsconfig.json
├── node_modules
│ ├── ...
├── package-lock.json
├── package.json
├── public
│ ├── svelte.svg
│ ├── tauri.svg
│ └── vite.svg
├── README.md
├── src
│ ├── App.svelte
│ ├── lib
│ ├── main.js
│ ├── styles.css
│ └── vite-env.d.ts
├── src-tauri
│ ├── build.rs
│ ├── Cargo.toml
│ ├── icons
│ ├── src
│ └── tauri.conf.json
├── svelte.config.js
└── vite.config.js
The two most important directories here are the src directory where our Svelte portion of the app lives, and src-tauri where our Rust portion of the app lives. Then we just need to launch the app in the dev environment with:
npm run tauri dev
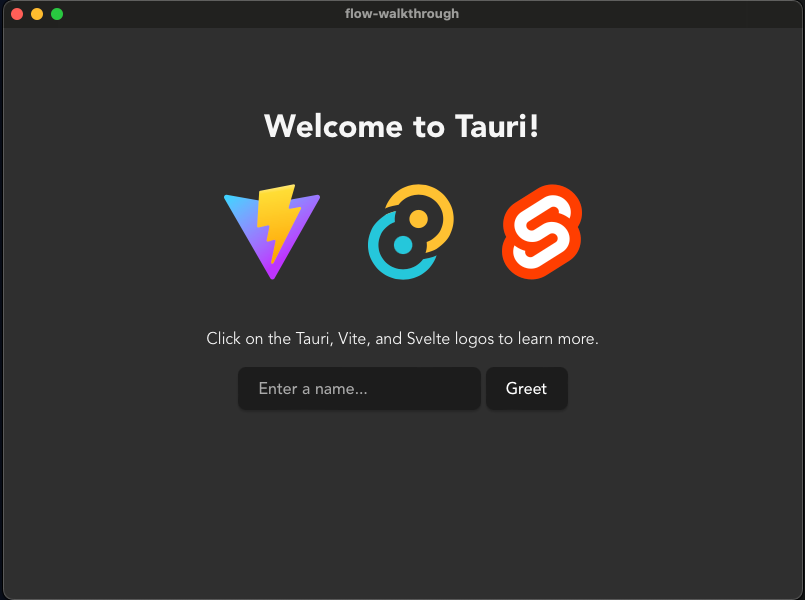
I usually add this to a justfile, so I can simply type just run. You should get this application that launches on your desktop.
The default app has already wired up a function call between Javscript and Rust, now we are going to add Svelteflow, a part of the XYFlow family of javascript node visualization libraries to the Svelte portion of the app. Adding this is a bit of code and the app will be broken until you finish, so x out or end the application with crtl-c in the terminal. Then from the root directory move to the /src folder and use npm to install the dependencies:
npm install @xyflow/svelte
And now we can include the library in our Svelte side of the app. The default project creates an application file in /src/App.svelte, open this file in the editor of your choice and then change the <script></script> section from this:
<script>
  import Greet from './lib/Greet.svelte'
</script>
To this:
<script>
import { writable } from 'svelte/store';
import { SvelteFlow, Background, BackgroundVariant } from @xyflow/svelte;
import '@xyflow/svelte/dist/style.css';
</script>
We comment out the Greet include as we aren't going to use that at all. Now we add in some data defaults so you can ensure that it is working. Add these variable assignments after the //... and before the end of the script tag.
NOTE: I generally use ellipsis, "...", to indicate other code, so we can focus on just what is changing.
const nodes = writable([
    {
      id: '1',
      type: 'start',
      position: { x: 100, y: 100 },
      data: { label: 'Start' },
    },
    {
      id: '2',
      type: 'end',
      position: { x: 300, y: 100 },
      data: { label: 'End' },
    },
  ]);

  const edges = writable([
    {
      id: 'e1-2',
      source: '1',
      target: '2',
      type: 'smoothstep',
      animated: true,
    },
  ]);

  const snapGrid = [25, 25];
There is a lot going on here so let's break it down to understand the variable assignments.
nodes: these are the points represented by HTML divs
edges: these are the connections between nodes
snapGrid: this is a parameter for how fine grained the snap grid is
Important Note: These variables must be set before calling the SvelteFlow component or it will not initialize. The nodes and edges variables can be empty, but you cannot wait on an async call like what we have in Tauri for connecting to Rust to gather them reliably before the component runs. And it's not a good idea to hard code these values, but it works to get this up and running as well as it makes it easy to manipulate them and see what the library is capable of.
Then we add the Svelte component in the HTML section of the file. Let's save the outer <main> tag and just replace the contents so our whole HTML section looks like this:
<main class="container">
  <div style:height="500px">
    <SvelteFlow
      {nodes}
      {edges}
      {snapGrid}
      fitView
      on:nodeclick={(event) => console.log("on node click", event.detail.node)}
    >
      <Background variant={BackgroundVariant.Dots} />
    </SvelteFlow>
  </div>
</main>
And now we should have a working node map with two nodes and one edge connecting them when we run npm run tauri dev.
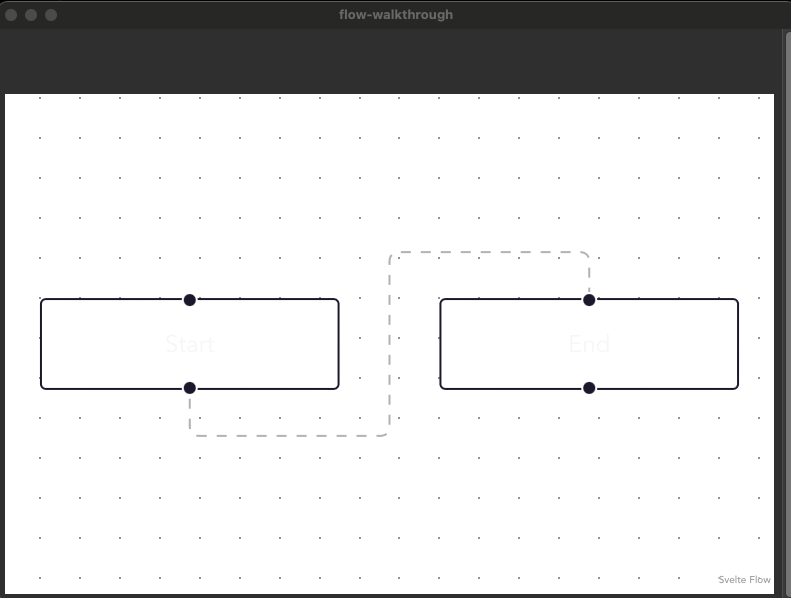
Kind of unappealing to look at though, so let's add some CSS styles. While with Svelte you might think you can add the styles in this file in the <style> section that won't work, as Svelte can't identify the CSS targets before the HTML is dynamically created and assumes you just created some badly targeted styles and will exclude them from the build. Instead let's create a file called node-styles.css and put it under the /src directory:
div.svelte-flow__node {
  background-color: green;
}

.svelte-flow__node div.svelte-flow__handle.source {
  background-color: blue;
  border-color: black;
}

.svelte-flow__node div.svelte-flow__handle.target {
  background-color: yellow;
  border-color: black;
}
Then we include it in the /src/App.svelte file right below the xyflow stylesheet include declaration in the <script> section so it is included statically.
import "./node-styles.css";

So we now have the front end basics with just a little bit of functionality. You can drag the nodes around, right click the app GUI and inspect the elements, use the inspect tools console to watch the node data get logged as you click nodes, basic stuff, but workable.
But we really shouldn't be hard coding the application data, and ideally we want the data in a structured data store so we can reliably perform CRUD(create, read, update, delete) without a code deployment or change things dynamically inside the app while being able to persistently save state, so let's wire up SQLite and make a call to rust to access the data store.
Start with adding our libraries with Cargo and then make sure we have the right features in our Cargo.toml file in the /src-tauri directory. So move to the /src-tauri directory and run this:
❯ cargo add serde serde_json dotenvy rusqlite
    Updating crates.io index
      Adding serde v1.0.195 to dependencies.
             Features:
             + std
             - alloc
             - derive
             - rc
             - serde_derive
             - unstable
      Adding serde_json v1.0 to dependencies.
             Features as of v1.0.0:
             - linked-hash-map
             - preserve_order
      Adding dotenvy v0.15.7 to dependencies.
             Features:
             - clap
             - cli
      Adding rusqlite v0.30.0 to dependencies.
             Features:
             41 deactivated features
    Updating crates.io index
As you can see from the output there are 41 features not yet activated for Rusqlite, so we have to activate some of them by modifying our /src-tauri/Cargo.toml file. The Cargo.toml file dependencies section should look like this:
[dependencies]
tauri = { version = "2.0.0-alpha", features = [] }
tauri-plugin-shell = "2.0.0-alpha"
serde_json = "1.0"
serde = "1.0.195"
dotenvy = "0.15.7"
rusqlite = { version = "0.30.0", features = ["bundled"] }
Really just adding the "bundled" features to Rustqlite should be enough, let's quickly go over the dependencies we've added and their uses:
serde_json: for handling JSON in Rust
serde: for providing serialize and deserialize traits to Rust structs
dotenvy: So we can use a .env file for storing local environment variables
rustsqlite: A simple wrapper for SQLite
- feature = "bundled": This feature uses a bundled version of SQLite instead of your system version.
Let's create a database to hold our nodes and edges and create functions the front end can call to retrieve the data. First we create two SQL files, one for bringing up the database and populating our data and the other for reversing that operation. Let's call them DB_UP.sql and DB_DOWN.sql and put them in the Rust source folder:
❯ pwd; tree
/Users/.../blog-demos/flow-walkthrough/src-tauri/src
.
├── DB_DOWN.sql
├── DB_UP.sql
├── lib.rs
└── main.rs
Now for the UP SQL file, we'll provision a minimum set of columns to store our node and edge data. Then after we create the tables we'll populate the same data we have hard coded into the tables. So here is the DB_UP.sql file:
CREATE TABLE IF NOT EXISTS nodes (
    id TEXT PRIMARY KEY,
    node_type TEXT NOT NULL,
    position TEXT NOT NULL,
    data TEXT NOT NULL
);

CREATE TABLE IF NOT EXISTS edges (
    id TEXT PRIMARY KEY,
    edge_type TEXT NOT NULL,
    source TEXT NOT NULL,
    target TEXT NOT NULL,
    animated BOOLEAN NOT NULL
);

INSERT INTO nodes (id, node_type, position, data) VALUES
    ('1', 'default', '{"x":100,"y":100}', '{"label":"Start"}'),
    ('2', 'default', '{"x":300,"y":100}', '{"label":"End"}');

INSERT INTO edges (id, edge_type, source, target, animated) VALUES
    ('e1-2', 'smoothstep', '1', '2', true);
The DB_DOWN.sql file is vastly simpler for this first step, and not necessarily something that will stay that way, but this works for now:
DROP TABLE IF EXISTS nodes;

DROP TABLE IF EXISTS edges;
One last thing to add before creating the database, and that is a data folder and a few lines to add that to the bottom of our base .gitignore file:
data
data/*
By default SQLite will create the database at any path it is given and open it, but we want to populate it with tables and data before we connect to it so here is how to do that in the terminal:
❯ mkdir data
❯ cd data
❯ sqlite3 flow_demo.sqlite3 < ../src-tauri/src/DB_UP.sql
You can check that the SQL statements worked either a GUI DB frontend like SQLite Browser, or you can open the DB on the CLI with sqlite3 flow_demo.sqlite3. I use both depending on the DB size and complexity, here's a quick check on the CLI:
❯ sqlite3 flow_demo.sqlite3
SQLite version 3.43.2 2023-10-10 13:08:14
Enter ".help" for usage hints.
sqlite> .h on

sqlite> .tables
edges  nodes

sqlite> select * from nodes;
id|node_type|position|data
1|start|{"x":100,"y":100}|{"label":"Start"}
2|end|{"x":300,"y":100}|{"label":"End"}

sqlite> select * from edges;
id|edge_type|source|target|animated
e1-2|smoothstep|1|2|1
sqlite>
Now that the data store should be up and working let's move into the Rust side to make our connections to it, start by navigating to and opening the /src-tauri/src/lib.rs file. First let's import the rusqlite lib, and create a few structs. So above all the default code in the lib.rs file add this:
use rusqlite::{Connection, Result};
use serde::{Deserialize, Serialize};

#[derive(Debug, Serialize, Deserialize)]
pub struct Node {
    pub id: String,
    pub node_type: String,
    pub position: String,
    pub data: String,
}

#[derive(Debug, Serialize, Deserialize)]
pub struct Edge {
    pub id: String,
    pub edge_type: String,
    pub source: String,
    pub target: String,
    pub animated: bool,
}
Before we remove the "greet" function comment it out and let's stub out our "get_nodes" and "get_edges" functions and register them as Tauri commands in the run function (.invoke_handler(tauri::generate_handler![get_edges, get_nodes])). So below the structs should look like this:
#[cfg_attr(mobile, tauri::mobile_entry_point)]
pub fn run() {
tauri::Builder::default()
.plugin(tauri_plugin_shell::init())
.invoke_handler(tauri::generate_handler![get_edges, get_nodes])
.run(tauri::generate_context!())
.expect("error while running tauri application");
}
#[tauri::command]
fn get_nodes() {
println!("get_nodes");
}
#[tauri::command]
fn get_edges() {
println!("get_edges");
}
Now let's convert the get_nodes() and get_edges() into actual database retrieval functions. Start with the function get_nodes():
#[tauri::command]
fn get_nodes() {
println!("get_nodes");
let conn = Connection::open("../data/flow_demo.sqlite3").unwrap();
let mut stmt = conn.prepare("SELECT * FROM nodes").unwrap();
let node_iter = stmt
.query_map([], |row| {
Ok(Node {
id: row.get(0)?,
node_type: row.get(1)?,
position: row.get(2)?,
data: row.get(3)?,
})
})
.unwrap();
for node in node_iter {
println!("Found nodes {:?}", node);
}
}
I recommend this approach of basic output to the CLI as soon as you can, which let's you isolate concerns and ensure that smaller parts work well alone before wiring them all together (this would be the step where we add unit tests if there was any chance of this moving to production).
Note: Positional assignment of query columns is not robust, but it's fast to implement so we'll stick with that for now.
Then we basically repeat the function for edges:
#[tauri::command]
fn get_edges() {
println!("Rust call get_edges");
let conn = Connection::open("../data/flow_demo.sqlite3").unwrap();
let mut stmt = conn.prepare("SELECT * FROM edges").unwrap();
let edge_iter = stmt
.query_map([], |row| {
Ok(Edge {
id: row.get(0)?,
edge_type: row.get(1)?,
source: row.get(2)?,
target: row.get(3)?,
animated: row.get(4)?,
})
})
.unwrap();
let mut edges: Vec<Edge> = edge_iter.map(|edge| edge.unwrap()).collect();
println!("edges: {:?}", edges);
}
So now we need to start executing the Rust functions to test that they are working correctly, for that let's go back over to the Svelte source and add in some invoke() based functions to call Rust from Javascript by modifying the App.svelte file.
  async function _get_nodes() {
    let _all_nodes = await invoke("get_nodes");
    console.log(_all_nodes);
  }
  _get_nodes();

  async function _get_edges() {
    let _all_edges = await invoke("get_edges");
    console.log(_all_edges);
  }
  _get_edges();
So these functions use the Svelte invoke() call to call the registered Rust functions. The console.log() calls don't actually log anything as we aren't passing anything from Rust yet, but the CLI should show the println!() from Rust so we can see the data and that it is working. It's also worth noting that we are calling the function immediately after defining it, this is useful while building so we can test early but definitely won't be our final state.
After testing the functions we need to start returning data from the Rust functions, so we set the return type to a Vec of our structs and add a new line at the end of the Rust get_nodes() function:
fn get_nodes() -> Vec<Node> {
...
    println!("DB nodes: {:?}", nodes);
    nodes
}
And do the same for the Rust get_edges() function:
fn get_edges() -> Vec<Edge>{
...
    println!("DB edges: {:?}", edges);
    edges
}
Now it's time to start making the Javascript useful, the data we are getting from Rust is close to what we need but one of the keys has to be translated. The "node_type"/"edge_type" keys are used so they don't conflict with the "type" keyword in Rust, in general we can avoid such problems by naming keys/variables "kind" as it has a similar meaning, but SvelteFlow set this key name so we have to work around it as a programming quirk. This makes things a little more complicated as we have to do this with async calls so we have to add a Promise(). So let's change the _get_nodes() function.
async function _get_nodes() {
let _all_nodes = await invoke("get_nodes");
console.log(_all_nodes);
Promise.allSettled(
_all_nodes.map((item) => {
delete Object.assign(item, { ["type"]: item["node_type"] })[
"node_type"
];
}),
);
console.log(_all_nodes);
}
_get_nodes();
As with any little quirk we have to work around when dealing with external libraries, services or data stores make sure you leave a comment describing why you need to do this (good habit). You may not need this comment now, but if you come back to this code in a few years, or someone else has to work on it you can get back to correct understanding of the purpose quickly, and hopefully avoid an unintended breaking change for code that looks superfluous in focus but is needed for the whole app.
And then add to the _get_edges() function in the same way.
async function _get_edges() {
let _all_edges = await invoke("get_edges");
console.log(_all_edges);
Promise.allSettled(
_all_edges.map((item) => {
delete Object.assign(item, { ["type"]: item["edge_type"] })[
"edge_type"
];
}),
);
console.log(_all_edges);
}
_get_edges();
Almost done with our persistent data store. We just need to remove the hard coded variables for edges and nodes with a placeholder. This let's the canvas initialize.
  const nodes = writable([]);
  const edges = writable([]);
Then we update the node and edge values from our back end calls to the database. The values aren't exactly what we are looking for as some of them are stored as JSON objects(strings) in the DB fields, and we have to loop through the returned values and parse these into the correct values in the nodes and edges main values. Here is that looks like in the _get_nodes() and _get_edges() functions in App.svelte.
console.log(_all_nodes);
for (let _node of _all_nodes) {
console.log(_node);
nodes.update((n) => [
...n,
{
id: _node.id,
type: _node.type,
position: JSON.parse(_node.position),
data: JSON.parse(_node.data),
},
]);
}
}
_get_nodes();
And here is the remainder of the edges function:
...
console.log(_all_edges);
for (let _edge of _all_edges) {
console.log(_edge);
edges.update((e) => [
...e,
{
id: _edge.id,
source: _edge.source,
target: _edge.target,
type: _edge.type,
animated: true,
},
]);
}
}
_get_edges();
And that is basically as far as I'll go in this blog post, 4 major components wired up and working locally. Building this for different platforms or finishing up the CRUD operations might come in a future blog post.
Code: https://github.com/gatewaynode/tauri_flow_walkthrough
Debugging NOTES
- It's possible to hard hang the local webserver for Tauri in dev if you typo a config and save (hot reloading will try to run, but...), preventing the local build from showing up due to port 1420 still in use. To fix this find the process in the terminal with
lsof -i tcp:1420 to get the PID, and kill it with sudo kill -9 PID.